When logging in your VM, you can see two directories "Desktop" and "notebooks". All the sample notebooks stay in the "notebooks" directory. When we access Jupyter notebooks, we are actually access the notebooks on Jupyter server. We can access Jupyter server by typing https://[vm_ip]:[port_no] in a browser tab.
In DSVMs, there is a default port 8000 already configured and the Jupyter server is automatically launched when the DSVM is provisioned. The user can access the "notebooks" directory by using address https://[vm_ip]:8000 and run all the notebooks under this directory right away.
Sometimes, you need to manually start the Jupyter server for other reasons (e.g. your notebooks are stored in a different directory). You need to perform following steps.
- Navigate to your home directory to locate file jupyter_notbook_config.py file (see screeshot below). If the file does not exisit, execute "jupyter notebook --generate-config" in console.
- Add c.NotebookApp.notebook_dir = ‘/home/mylogin
/’ to make Jupyter server point to it when started (see screenshot below). You can use a different directory path as well. 
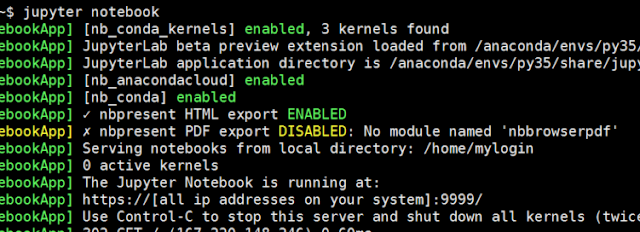
Execute "jupyter notebook password" and set the password in console. 4. Execute "jupyter notebook" in console to start the Jupyter server. When the server is launched, the output will look similar to below screenshot. Locate the port number, which is usually 9999 as shown below.
Go to the overview page of your VM in Azure portal to add in-bound rule for port 9999 (It can be another port if you have other configurations). Now you can access the above set directory at https://[vm_ip]:9999

